header
blog


{personal image}

This past weekend I finally got to walk to the farmers market here in Walnut Creek with Pat and Rhody. Of course as soon as we got there we realized that dogs aren’t allowed, but Pat was only going to appease me anyways so I walked through quickly and picked up all the end-of-summer fruits and veggies to make my canning-loving heart content. That, and some kettle corn which was a total impulse buy perfectly positioned at the end of the lot. We needed kettle corn, know what I mean?

Anyways… I have been canning like crazy and made some three-berry jam with the freshest, sweetest blackberries, raspberries and strawberries you’ll ever taste - I make my jam with very little sugar because the berries are so sweet, you really don’t need it! Oh, and with a lemon straight off the tree, I added some fresh squeezed lemon juice for a tiny added kick of flavor. If you want a quick DIY on how to can jam, I put one up last summer and you can find it here.

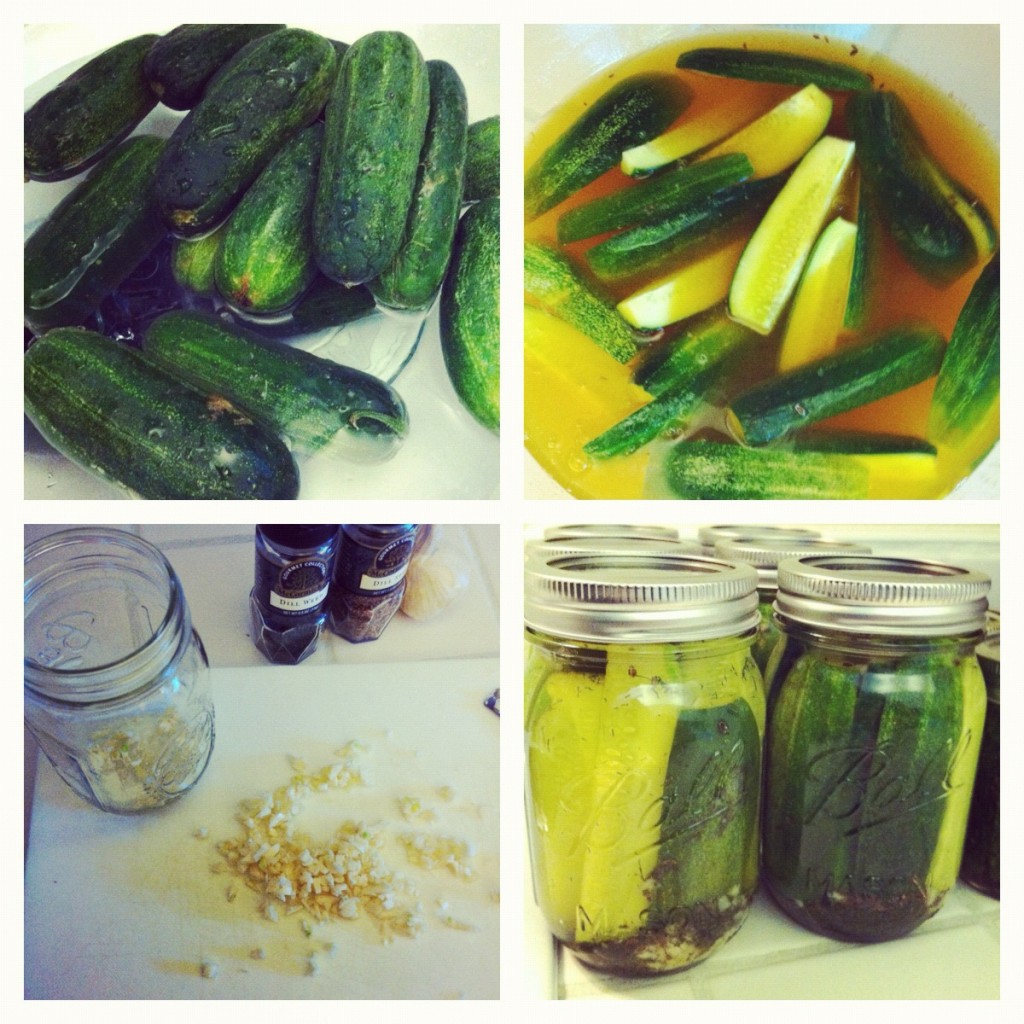
Along with my berries, though, I also purchased some mini cucumbers perfect for pickles along with sweet, white peaches for chutney that I’ll be making later this week when they ripen just a bit more. Last night I made all the dills and once I put a pic up on instagram, I had several requests for the recipe. So… here you go! PS - I totally have to credit my Aunt Becky for this because she showed me how to make dill pickles, step by step, one summer day years ago in her kitchen.
Dill Pickles Recipemodified from mccormick’s version
Yields 6-8 pint jars or 10-12 8-oz jars. You can get your jars at your local hardware store, the grocery store (sometimes) or Target (for sure). In fact, Target had them at 10% off when this post was published on August 29, 2012.

Ingredients:
for the prep
18-20 mini cucumbers (about 4-5 inches long)
4 teaspoons ground turmeric (I just eyeball it and usually add a bit more for color)
2 1/2 quarts boiling water
LARGE bowl, big enough for all the cucumbers plus room to stir boiling water when you add it
for the pickles
1 jar dill seed
1 jar dill weed (dried)
6 cloves fresh chopped garlic (or more depending on your taste preference)
4 cups distilled white vinegar (5% acidity)
4 cups boiling water
4-5 tablespoons non-iodized salt (think popcorn salt, the really powdery kind)

Directions
1. Rinse cucumbers well with cold water. Trim ends and quarter cucumbers lengthwise. Place in large bowl with turmeric. Pour boiling water over cucumbers; stir well. Let stand at room temperature for 1 hour. Drain. Rinse and drain again.

2. Place 1 tablespoon each dill seed and dill weed, and 1 teaspoon minced garlic in each of your jars. Note - I totally eyeball this. I like my pickles really dilly so I usually add a little more than this. Totally up to your taste preference!

3. Mix last three ingredients on the list (4 cups water, 4 cups vinegar, salt) in large saucepan. Bring to boil, stirring to dissolve salt. When ready, pour in to a large pitcher or measuring cup (in increments) so it’s easier to pour in to the jars later.

4. Meanwhile, firmly pack cucumber wedges vertically into jars. Ladle (or pour from pitcher) hot liquid over cucumbers, leaving 1/4-inch headspace. Run thin, non-metallic utensil down inside of jars to remove air bubbles. Wipe rim of jars clean with damp cloth. Cover jars with metal lids and screw on bands.

5. Process in boiling water canner at 180° to 190°F (simmering water) for 15 minutes. After processing jars, remove from water bath canner. Cool at room temperature on towel or rack for 12 to 24 hours. You’ll know they’re ready when you hear the seals popping in the other room. Dill pickles are processed at a slightly lower temperature (simmering water vs. boiling water) to produce pickles that do not become too soft.

enjoy!
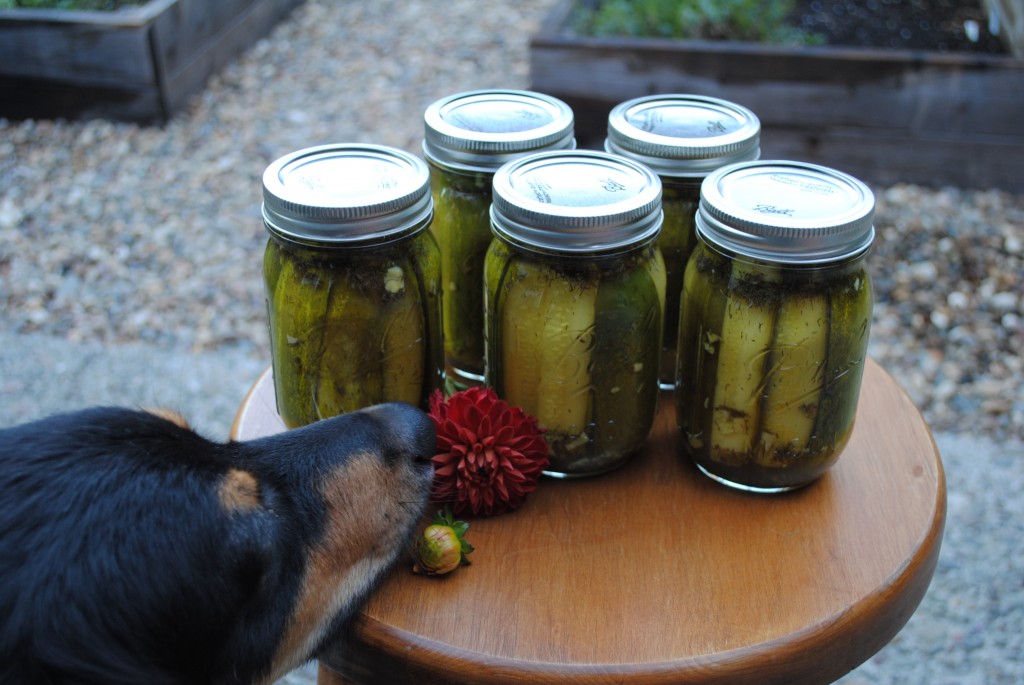

{rhody photobomb}


{all images shot in film by jessica burke}

I remember enjoying these tasty, chocolaty treats as a kid when my best friend’s mom would bring over a big terracotta pot filled with pudding, cake and cookie crumbles to picnics. I mean really what is better than chocolate crunchies and pudding? Love. So I wanted to try them out in a mason jar, something you could totally make with the kids, and transfer easily to your family picnics. Here’s what you need to make them at home!

Ingredients:

  • your favorite chocolate cake mix or recipe
  • 8oz mason jars with lids
  • 1/2 package of oreos or chocolate sandwich cookies, crushed in food processor
  • gummy worms
  • chocolate pudding mix


Directions:

  • Pour cake mix in to jars and fill about 1/4. Cook as directed by cake mix using the water bath method we used previously.
  • Prep pudding, chocolate crunchies and gummy worms in little bowls so the kids can have fun filling the “dirt” cups.
  • Once the cake portion is complete, add the gummy worms, followed by the pudding, then more gummy worms, then a layer of chocolate crunchies to look like “dirt”
  • Finish off with a pretty ribbon to match your party
  • If traveling, screw on the mason jar lids and pack in a cooler to bring with you - serve and enjoy!

A fun idea to serve these is by using wooden spoons and painting the handles silver, so they resemble little shovels.

Have fun :)


{all images shot in film by jessica burke}

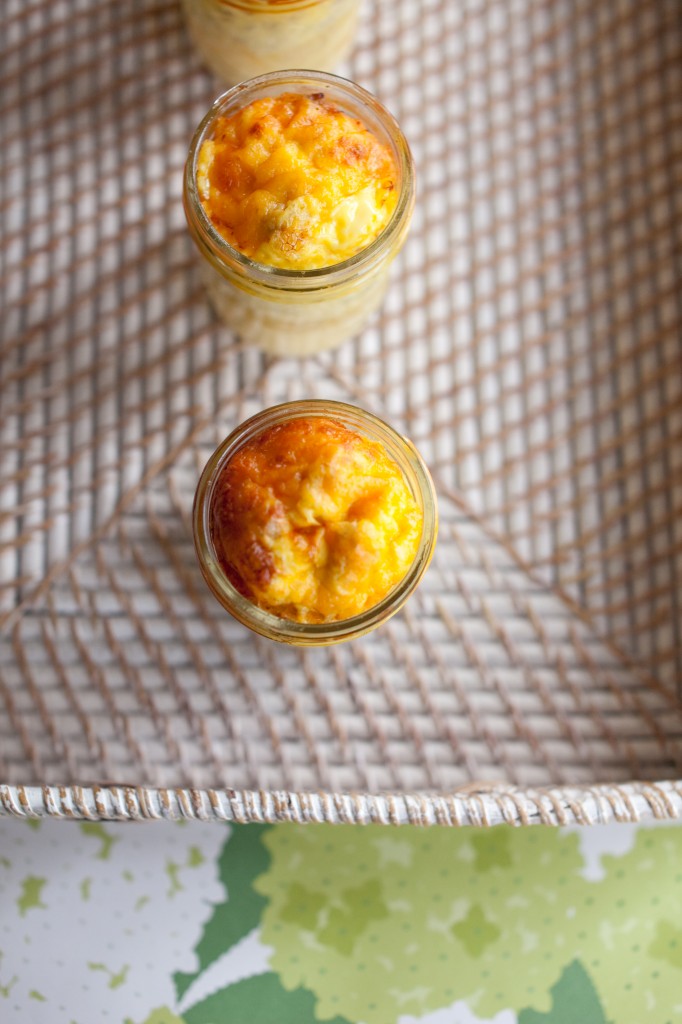
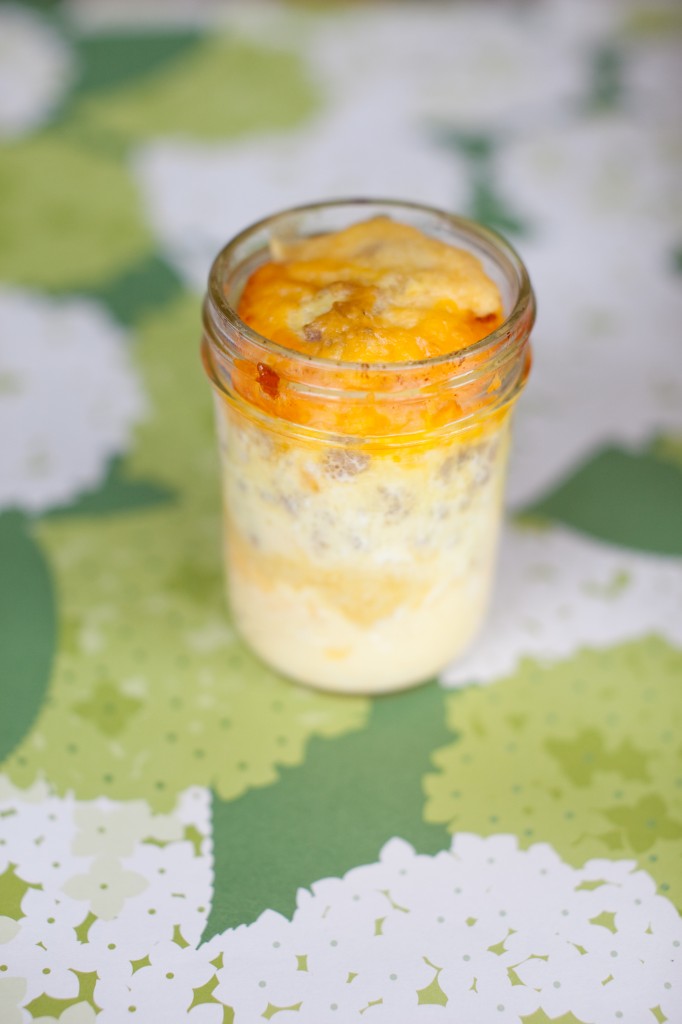
I am a sucker for breakfast food - give me a bacon, egg and cheese any time of day and I’m a happy girl. whenever we go back east, my mother-in-law always makes this amazing casserole for us, something that can easily be made ahead the day before, and it’s a yummy breakfast that I seriously look forward to. so of course, the next question was, could it be made in a jar? and the answer is yes. bake these little babies ahead of time and throw a lid on and you’ve got yourself a delicious breakfast on the go. count me in! and they’re easy as can be. how adorable would these be as little take-aways for the day-after-the-wedding brunch? here’s how to make them:

ingredients
4-oz mason jars
6 eggs
1/2-3/4 cup milk
pre-made pie crust or crescent roll dough
breakfast sausage roll
1 bag of shredded cheddar cheese
salt & pepper, to season

directions
1. set oven to 375

2. set up your water bath, like we did for the s’mores cupcakes

3. cook your breakfast sausage and drain excess oil. set aside.

4. cut your crescent dough/pie crust in to small pieces and push to bottom of mason jars. throw in oven for 5 minutes to start “cooking” the dough.

5. whisk eggs and milk in a bowl, add salt & pepper to your liking. I don’t like pepper so I never add it.

6. add a few pinches of shredded cheddar cheese to each jar. pour the egg/milk mixture over the cheese, leaving about 1/2″ at the top of each jar for the casserole to rise, then add about 2-3 tbsp of sausage to each jar pushing through the mixture. note - it doesn’t have to be in this order, this just worked best for me.

7. bake at 375 for about 15-20 minutes or until the casseroles are just starting to brown. remove from oven and enjoy!

these can totally be made with anything under the sun - crispy bacon, lots of veggies, you name it.


{all images by jessica burke}

this little project was one of the easiest things ever. it’s a bit tedious to set up, but other than that, it’s pretty and colorful and fun - especially for a wedding favor or birthday party treat. here’s what you need to do!

ingredients:
white cake mix (or your favorite white cake recipe)
food coloring
4 small bowls
spoon
4-oz masons
white frosting
pretty sprinkles

directions:
1. mix up your white cake mix according to directions.
2. pour in to your separate bowls and add 1-2 drops of food coloring in each. stir well to mix the color.

3. pour about 3 -4 tablespoons of each color in to your mason jars, layering each color as you move up towards the top. leave about 1/4 cup of space towards the top of the jar to leave room for the cake to rise.
4. cook as directed, using a “water bath” as we did with the s’mores cupcakes
5. remove from oven and let cool off, then frost each cupcake and add sprinkles to your liking.

6. serve and enjoy!

my favorite part about this project was being able to see the pretty colors through the jar, but when you used a fork to take a bite from the actual cupcake, there was such a pretty “tie dye” effect inside, too!


{all images shot in film by jessica burke}

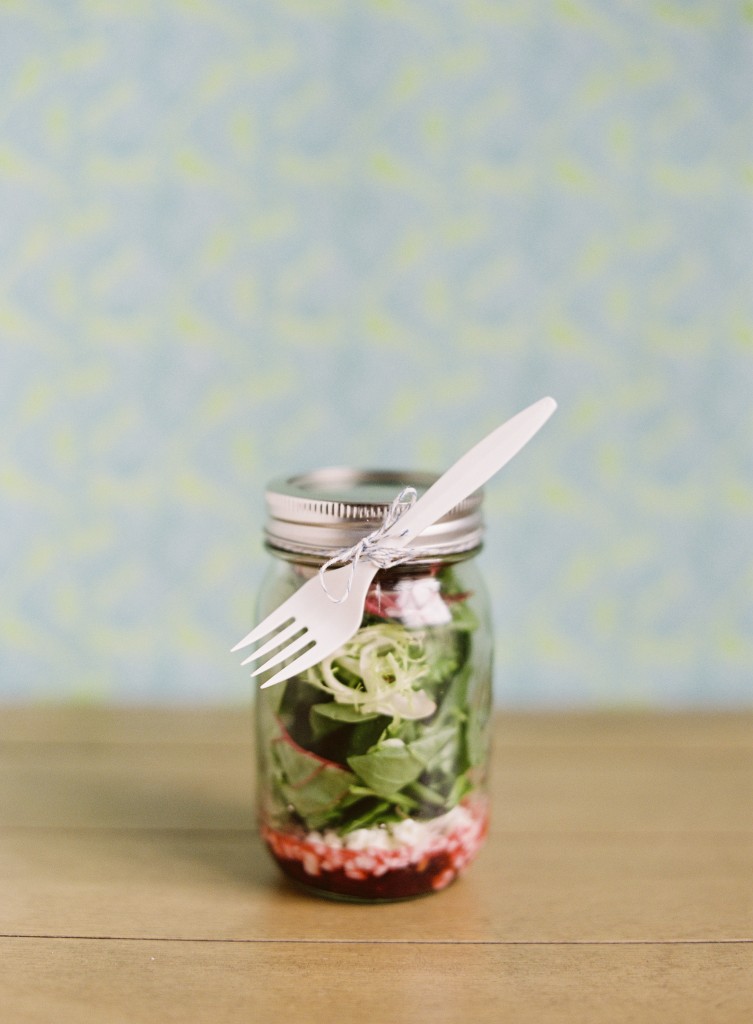
I’d seen this idea swirling around pinterest for a while and Jessica and I decided to give it a go a few weeks ago when we were in mason jar craft mania land. the result? super cute, super easy, and super green. saving $ is key these days, and every time we buy lunch out it adds up - these mason jar “to-go” salads are a convenient way to bring your lunch to work, and you can just bring the jar home at the end of the day to use again. and by layering the dressing on the bottom in between the cheese/nuts and lettuce, you eliminate the “soggy lettuce” that can typically happen otherwise. here’s how you can do it:

ingredients:

  • 1/2 qt. mason jar (or any size to your liking)
  • all the items you’d typically put in a salad - in this case, I used strawberry vinaigrette dressing, goat cheese crumbles, candied walnuts & dried cranberries, and mixed greens
  • optional: baker’s twine
  • optional: plastic fork

directions:

1. pour your dressing in to the bottom of a clean, dry mason jar
2. add the nuts & cranberries, followed by the cheese crumbles. make sure to make an even layer as this will prevent the dressing from getting to the leaves and making things soggy.

 3. add the mixed greens and secure the jar with the lid and seal.


4. optional: tie a plastic fork to the jar with bakers twine or ribbon to make it pretty and convenient.
5. when ready, shake the jar to mix all ingredients, open and enjoy!


{all images by jessica burke}

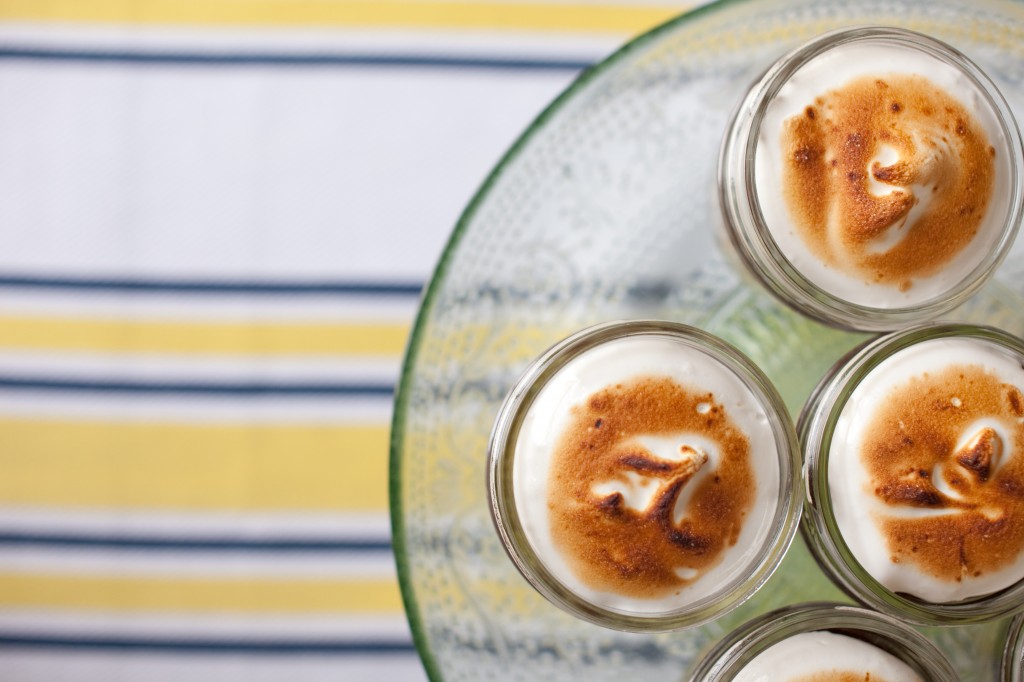
i have always been more of a salt/savory person than sweets, but s’mores cupcakes are one of my dessert weaknesses. i have been wanting to try the whole “cooking in jars” thing for a while now, so decided to see if i could cook s’mores in a mason jar for a portable and pretty treat. wouldn’t these be a fun alternative to a s’mores bar for your wedding? you could make them all beforehand (please enlist help of bridesmaids and don’t take this on the day before your wedding!) and leave them as lovely little favors. here’s how you can make them yourself :)

materials/ingredients:
note - the marshmallow frosting recipe and directions are derived from annie’s eats

  • chocolate cake mix {or follow your favorite chocolate cake recipe}
  • 1½ cups graham cracker crumbs {about 1 box graham crackers}
  • ¼ cup sugar
  • 5 1/3 tbsp. unsalted butter, melted
  • candy thermometer
  • 8 large egg whites, at room temperature
  • 2 cups sugar
  • ½ tsp. cream of tartar
  • 2 tsp. vanilla extract
  • 2-3 bittersweet chocolate candy bars
  • 24 4-oz (mini) mason jars
  • cookie pan or deep cooking pan lined with water
  • kitchen torch

directions:
1. preheat oven to 350

2. prep your mason jars by cleaning and drying before use and line on your cookie sheet or cooking pan with about 1/2″ of water (enough to cover at least 1/2″ of the mason jar bottoms)

3. using a food processor (or a baggie and meat tenderizer/rolling pin) crush the graham crackers in to consistent crumbs

4. combine graham cracker crumbs, sugar and butter in a small bowl and place ~1 tablespoon of graham cracker mixture in to the bottom of each prepped mason jar.

5. using a spoon {or whatever you have handy}, flatten the graham cracker crumbs to the bottom of the jar so they’re nice and compact, making your “base” for the cupcakes.

6. bake the graham cracker mixture in masons for 5 minutes. remove from oven (duh).

7. break your chocolate candy bar in to bits and put a little piece in each jar on the top of the graham cracker mix before adding the chocolate cake.

8. mix and prep your chocolate cake mixture as the box directs (or your favorite chocolate cake mix).

9. pour chocolate cake mix in to jars, filling about 2/3 full. bake about 18-20 minutes and use a toothpick to check if they’re ready, then remove from oven.

10. marshmallow recipe from annie’s eats - i had never made my own marshmallow before, so i found this to be the most user-friendly, though i’ll admit i used a lot more cream of tartar to make it “set”. To make the frosting, combine the egg whites, sugar and cream of tartar in the top of a double boiler. (Note: I just set my clean, dry mixer bowl over simmering water, to avoid dirtying two bowls.) Heat the mixture, whisking frequently, until it reaches 160° F with an instant-read thermometer. Transfer the mixture to the bowl of an electric mixer fitted with the whisk attachment. Whisk starting at low speed and gradually increasing to medium-high speed until stiff, glossy peaks form. Mix in the vanilla until combined. or hey - don’t want to make your own marshmallow frosting? i won’t judge you if you just use a jar of marshmallow fluff :)

11. spoon frosting on to top of mason jar cupcakes - you can swirl it around a bit to make it look pretty - then using your kitchen torch, lightly “toast” the marshmallow frosting to give it a slightly browned look.

note - if using as wedding favors, apply the lids to your mason jars so guests can easily transport them home, or have them readily available near the jars so guests can add them if they don’t eat right away.

enjoy!


{personal image}

in keeping with the healthy recipe posts from my trainer’s shred* diet, today’s is something i threw together last night in an effort to use ingredients i know are part of the plan, and see if we could change things up a bit from the same things we’d been eating every day. and let me tell you - this is SO delicious and flavorful, you’d never know it was healthy too! (you may have also seen me post a picture on instagram last night, my username is “lovelydetails” if you care to follow!) my favorite part about this recipe is that it is 100% natural - from fresh tomato puree to ground turkey, there is nothing artificial or processed!

here’s the recipe:

jacin’s turkey, tomato & basil soup

ingredients:
2 packages (8oz total) lean ground turkey
1 medium yellow onion, chopped
2 carrots, peeled and chopped
Fresh basil, chopped (as much or as little as you like, depends on your taste and you can always add more)
8 cloves garlic, chopped
7 whole medium tomatoes (on the vine)
1 arbol chili pepper, stem removed
1 tbsp olive oil
salt, garlic salt, garlic powder, red chili flakes (all added to your liking)
1 tbsp apple vinegar

directions:
remove stems from 7 medium roma/on the vine tomatoes, rinse, and throw in a blender along with the chopped carrots to puree. add a bit more basil and the arbol chili to the blender mix.

in the meantime, sauté onion & garlic in a large pot with olive oil over medium heat (about 5 minutes), add red bell pepper and chopped basil (to your liking). add ground turkey, salt, garlic salt, garlic powder & chili flakes. cook turkey through, about 5-8 minutes, stirring occasionally. add the tomato puree and vinegar, bring to a boil for about 10 minutes. simmer on low until ready to serve.

or

cook turkey through, puree tomatoes, sautee garlic & onion separately then throw all ingredients in to a crock pot and let it do the work for you.

this is seriously so delicious it felt like we were having a cheat meal! high in protein, low in carbs and tons of flavor.

enjoy!

*note: i am not trying to lose weight per se, i’m just trying to get back to my old wedding self. this is not a crash diet, it is a healthier way of living for us. i lost 26 lbs by following this plan before our wedding and now i’m just trying to gain the muscle back and get closer to where i started over a year ago. my trainer put this diet together for us, and no two people are the same, so please consult with your own trainer/nutritionist before following such a plan. in the meantime though, enjoy these healthy recipes because they are yummy.

wow, i don’t think i can thank all of you enough for your amazing comments yesterday and outpouring of support on my “standing up to bullying” post. i hope it was able to inspire you to take action wherever you may be as well.

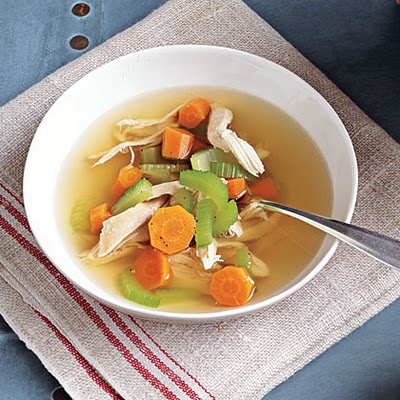
moving on, though, today i wanted to share with you a yummy recipe pat and i conjured up to be trainer-approved during our january “shred” eating plan. no, i’m not trying to necessarily lose weight, but i am trying to get back to where i started before eating/drinking everything in sight over the holidays. so today’s recipe is for chicken soup with tons of protein and flavor but without chicken broth or boullion cubes, giving it a major overhaul in the calorie zone. i LOVE hearty soups, especially in winter, and this one is delish (if i do say so myself). you don’t even miss the noodles!

here you go!

jacin’s chicken soup

ingredients:
5-6 cloves garlic, minced
1 ½ yellow onions, chopped
1 bunch celery (6-8 stalks) chopped
5-6 carrots, peeled and chopped
6-8 chicken breasts, chopped in to bite size pieces
Optional: 2 red bell peppers, chopped
Garlic salt
Regular salt
½ tbsp olive oil
Water

directions:
Heat oil in a large pot over medium heat. Add garlic and onions, stirring for about 5 minutes until soft. Add celery, carrots, and peppers (if used). Cook for about 10 more minutes on medium heat. Add garlic salt & regular salt (to taste). Add chopped raw/frozen chicken and stir until chicken is cooked through (about 10 minutes). Add enough water to cover all ingredients by about ½”. Turn stove to high and boil for 10 minutes, then turn to low and simmer for as long as you need.

or

Cook chicken through and put all ingredients in a crock pot and let it do the work for you all day.

 enjoy!

How the heck do you title a post that is technically for a “meat rub”? I couldn’t think of a way that wouldn’t attract every spammer on the planet, so I did my best haha :)

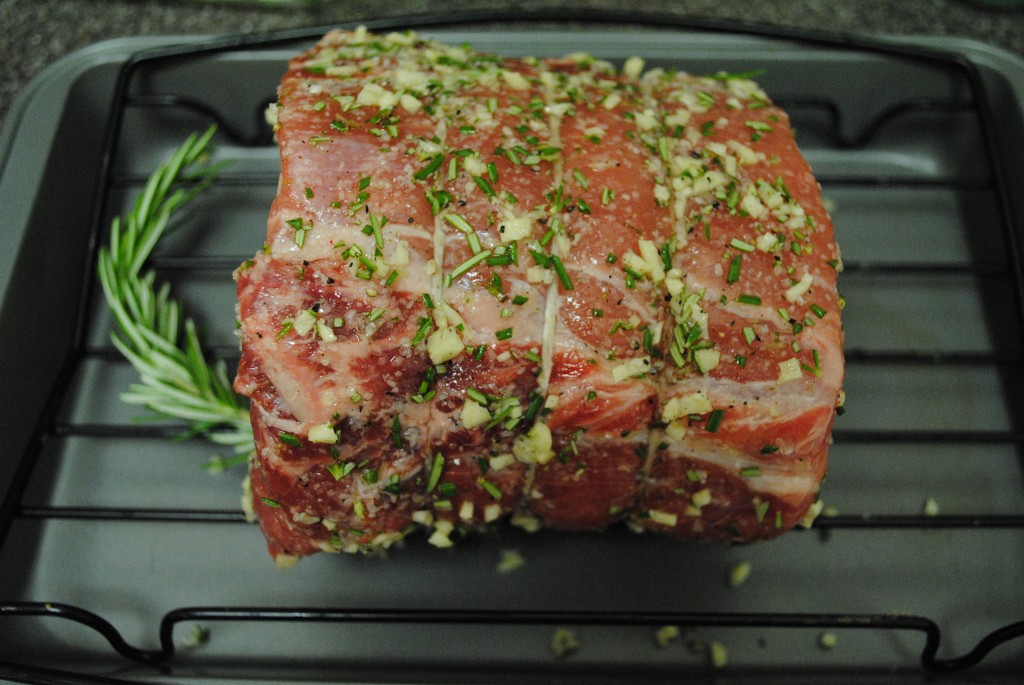
Anyways… this is the simplest recipe ever and it takes about 5 minutes. I made this for my first “dinner party” with Pat’s parents and my parents about 5 years ago, and it’s been a favorite ever since. I love that it makes you look like you’re a real chef, when really, it’s so simple (but no one needs to know that, right?)

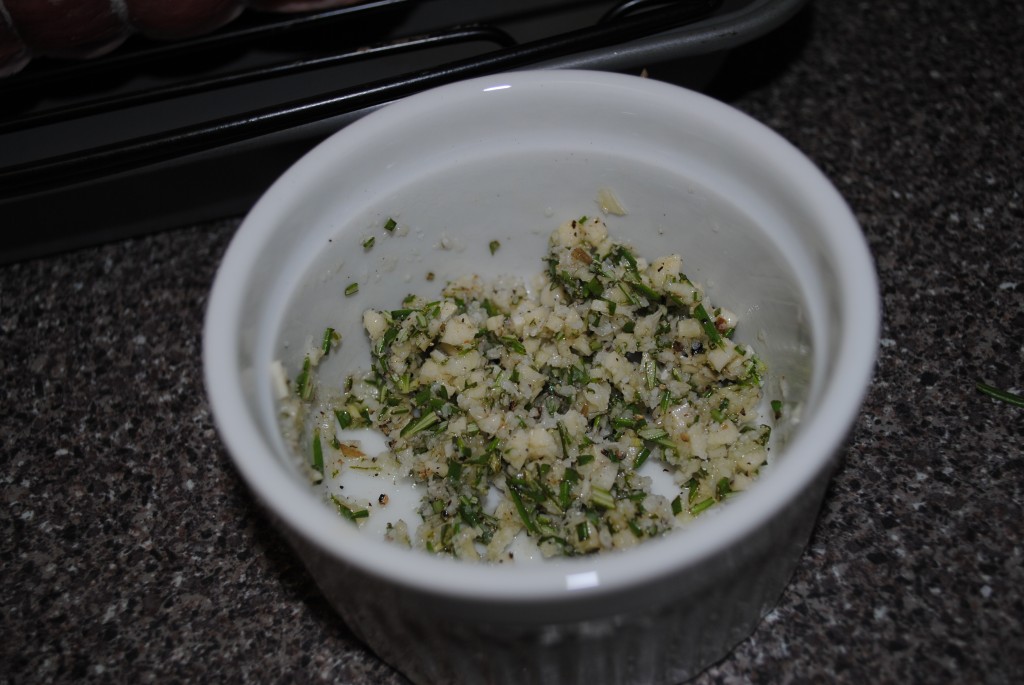
Garlic & Rosemary Rub Recipe

Ingredients (increase/decrease depending on size of meat):
Garlic cloves
Rosemary sprig
Salt (I use Mortons coarse salt because I like the crunchy bites of salt)
Olive Oil (enough to liquefy all other ingredients)
Ground pepper

Instructions:
Chop all ingredients and mix together.

Generously apply to all ends of the meat (in this case I used pork, but prime rib is delish too). Cook as directed depending on meat.

Serve and enjoy! This is really tasty with a side of homemade applesauce :)

Hi, Amanda from baci designer stationery + events here! When I saw Jacin write about starting this new series, I just knew I had to share our three days of family (and food!) filled traditions. My husband, Ilario, and I live close to his family, but about three hours from mine, so it can be tricky to plan out time with each group, but after seven years together we’ve got it nailed down pat ;)

The festivities start on “Christmas Eve Eve” as we like to call it, when we eat a giant feast of pot roast, drink homemade Irish Cream and spend time with our best friends, The Moore Family. My dear friend married Ilario’s best high school buddy and now their entire family has essentially became ours - we couldn’t image the holidays without all of them!  On Christmas Eve we start the fun at my husband’s parents’ house where we eat homemade zeppole, an Italian doughnut, straight from the pan with sardines for the salt lovers or coated in powdered sugar, our nephews’ favorite treat! After we’ve stuffed ourselves to the gills with fried dough we start on the meatless, seafood meal - this is a tradition my husband’s Italian family has continued to uphold since his grandparents and parents came to America. As the evening progresses we open presents - my husband and I started a tradition of gifting our nephew’s special Hallmark Christmas ornaments each year, a tradition my grandmother started with me and my cousins when we were very little. My mom has even started doing the same with our immediate family, it’s so much fun to to look back at the ornaments from each year!

Christmas morning Ilario and I wake up at the crack of dawn, we pack up the car and hop on the road for the drive to my mom and dad’s. Our kitty, Morris even gets to come along each year - he loves spending the holidays exploring my parents’ house! It’s such a great ride with few people on the road and Christmas tunes blaring on the radio! It’s even more wonderful if we get a few Ohio flurries on the way!!


{Morris on his very first Christmas at my parents’ house - 2009}

We really look forward to sharing these traditions with our future children and maybe even adding a few new ones of our own.  And so you, too, can enjoy a small part of our holiday food-filled joy, I’m sharing my mother-in-law’s zeppole recipe!  She doesn’t really measure or write down actual recipes, lol, so feel free to tweak as you see fit since these measurements are strictly estimates.

Cursaro Family Zeppole

Ingredients
5 lbs flour
4 cups instant mashed potatoes mixed with enough water to make them slightly runny
1 t. sugar in warm water, add 5 - 6 t. yeast until foamy
1/4 cup salt
vegetable oil
warm water

Directions

  1. Place flour in a large bowl, add watery instant mashed potatoes and mix well.
  2. Add foamy yeast/sugar mixture.  Add more water and a bit of vegetable oil until you reach a doughy consistency.  Add more flour if it becomes too soft.
  3. Work dough, adding air into it so it’s nice and fluffy.  Cover bowl with plastic wrap or a plastic bag and set aside - this will save you time working the dough.  Repeat and cover again with plastic to let the dough rise.
  4. When dough has finished rising, place into a clean well oiled bowl.  Fill a small bowl with oil to dip your fingers in so the dough doesn’t stick to your fingers.
  5. Fill a frying pan 3/4 full of vegetable oil - heat oil until a small piece of dough rises to the top and browns in a couple of minutes.
  6. Pinch a bit of dough, quickly spread it or stretch it then carefully place it into the hot oil.  Dough will rise to the top, when it’s golden brown flip over and repeat on the other side.
  7. Serve zeppole while it’s still hot sliced with an anchovy in the middle, with olives on the side or coated with a dusting of powdered sugar.

Enjoy and Happy Holidays!!

featured and seen in